DAQ systems: Genesys
For petal reception, two setups are required: FELIX (the one ATLAS will use) and Genesys (the one used by the petal manufacturers before shipping them to Nikhef). Genesys doesn't require servers and it's more simple than FELIX.
More info about the Genesys2 card can be found here: https://twiki.cern.ch/twiki/bin/view/Atlas/Genesys2ITSDAQ
ITSDAQ firmware: https://www.hep.ucl.ac.uk/~warren/upgrade/firmware/?C=M;O=D
Firmware: https://www.hep.ucl.ac.uk/~warren/upgrade/firmware/genesys2_itsdaq_vc5f0_FDP_STAR.bit
ITSDAQ software: https://gitlab.cern.ch/atlas-itk-strips-daq/itsdaq-sw
Documentation of the ITSDAQ software: https://atlas-strips-itsdaq.web.cern.ch (previous tracker documentation was called SCTDAQ and sometimes names may be mixed along the documentation).

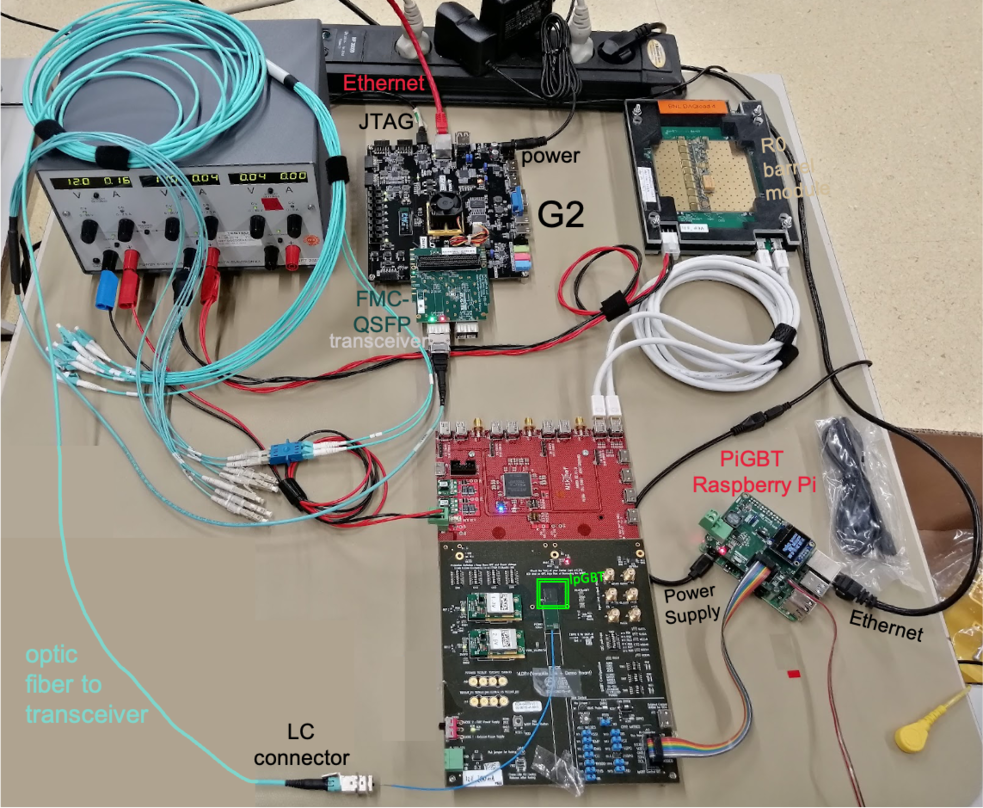
Working chain with VLDB+ and Nikhef adapter board: G2 --> FMC-QSFP --> VLDB+ --> Adapter Board --> Module
Genesys setup at lab N221 at Nikhef, mounted on 31st October 2022, consisting of a Genesys2 with FMC-QSFP and transceiver connected to the module through the VLDB+ and the adapter board which have the role of an EoS card:
How to configure the Genesys setup:
After installing the firmware and software, the server and Genesys must be able to communicate if the IP addresses are set correctly. You can check this with:
ifconfig
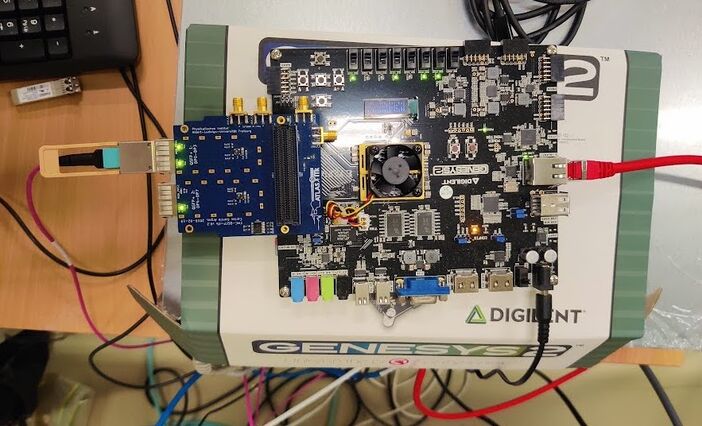
My Genesys is connected to the second ethernet interface eno2 of the ITk server (see the red ethernet cable going to the ITk server in the picture). The IP on eno2 has to be the same as the one shown on the display of the Genesys (192.168.222.16 for my Genesys), but changing the last digits, for example: 192.168.222.10. You can modify this in:
- In CentOS 7: vi /etc/sysconfig/network-scripts/ifcfg-eno2
- In Alma Linux 9: sudo nmcli connection modify eno2 ipv4.addresses 192.168.222.16
For the changes to take effect, you have to restart the network with the command:
- In CentOS 7: sudo /etc/init.d/network restart
- In Alma Linux 9: sudo systemctl restart NetworkManager
Create the directory: sctdaq/sctvar/config/ and inside of it, create these folders: config/ data/ etc/ ps/ results/. Copy all the configuration files from itsdaq-sw/config to /sctdaq/sctvar/config/ and execute the following commands:
cd itsdaq-sw
(cd /cvmfs/sft.cern.ch/lcg/releasess; lcgenv/latest/lcgenv -p LCG_96python3 x86_64-centos7-gcc8-opt ROOT) > env_file
source ./env_file
export BOOSTDIR=$BOOST__HOME/include
For CentOS 7 we used this setup.sh:
source /cvmfs/sft.cern.ch/lcg/views/LCG_100/x86_64-centos7-gcc8-opt/setup.sh
But for Alma Linux 9, root versions compatible with alma 9 are somewhat weird in the the sense that the interactive part does not work. However, use the following one (provided by Peter Philips), which is a patched version of root 6.26 that gives the complete functionality.:
source /cvmfs/sft.cern.ch/lcg/views/LCG_102b_ATLAS_11a/x86_64-centos9-gcc11-opt/setup.sh
python waf configure
python waf build
python waf install
export SCTDAQ_VAR=/home/aalonso/sctdaq/sctvar/config
export SCTDB_USER=0001
./RUNITSDAQ.sh
Once everything is set correctly, the commands configure, build and install no longer need to be executed.
The following GUI will be opened:
lpGBTAutoSetup()
lpgbtAuto_setPolarityCheck(0)
lpgbtAuto_setPolarityCheck(1)
AMAC_DCDC(-1,1)
NOTES
Up-to-date version of itsdaq-sw
Check the last version of the repo in: https://gitlab.cern.ch/atlas-itk-strips-daq/itsdaq-sw/-/tree/master?ref_type=heads
Connectivity issues
Check the network configuration file: sudo vim /etc/NetworkManager/system-connections/eno2.nmconnection
And make sure that the eno2 address is different to the one of the G2 board.
For example, eno2 should have IP address 192.168.222.10 instead of 192.168.222.16
For the changes to take effect, it's necessary to restart the network: sudo systemctl restart NetworkManager
UDP socket creation failed because the address is already in use
First, identify which process is using the ports (in my case 60000 and 60001):
sudo lsof -i :60000
If the process using these ports is not required, you can stop it. Note the PID (Process ID) from the previous command and kill the process:
sudo kill -9 <PID>
-- Main.AndreaGarciaAlonso - 2022-10-20


