Difference between revisions of "BeeHub/Step 2: Mounting BeeHub"
| Line 6: | Line 6: | ||
= Microsoft Windows = | = Microsoft Windows = | ||
| − | == Vista | + | == Vista and Windows 7 build-in clients== |
1. Open "Computer" from the "start" menu. | 1. Open "Computer" from the "start" menu. | ||
| Line 17: | Line 17: | ||
| − | == XP | + | == XP build-in client and below == |
1. Click "Start", and then "My Network Places": | 1. Click "Start", and then "My Network Places": | ||
Revision as of 11:32, 27 October 2011
Mounting BeeHub on your PC
After you've completed step 1 (getting an account), a new BeeHub account has been created for you, and you should have received an email with a username and password. If you haven’t, something has gone wrong and you should contact us.
What happens next depends on which operating system you're running. Please jump to the appropriate section on this page. If your favorite operating system or client is not on this page, please let us know.
Microsoft Windows
Vista and Windows 7 build-in clients
1. Open "Computer" from the "start" menu.
2. Right click on your mouse
3. Click on "Add a Network Location"
4. Continue XP Machines to #3
XP build-in client and below
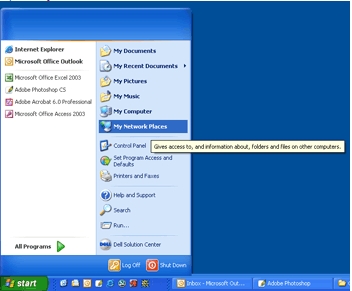
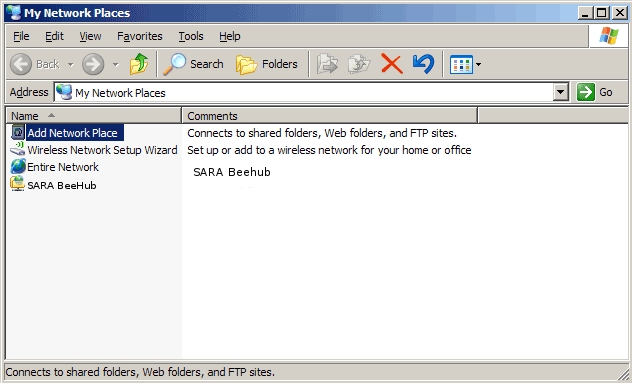
1. Click "Start", and then "My Network Places":
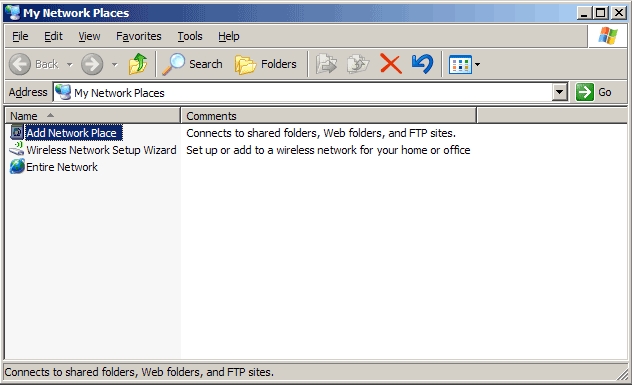
2. Click "Add Network Place":
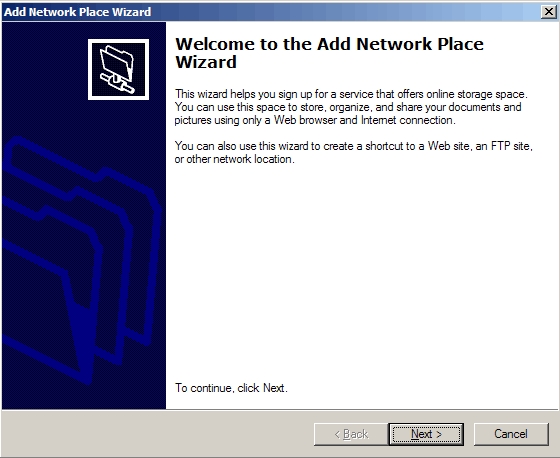
3. Click "Next":
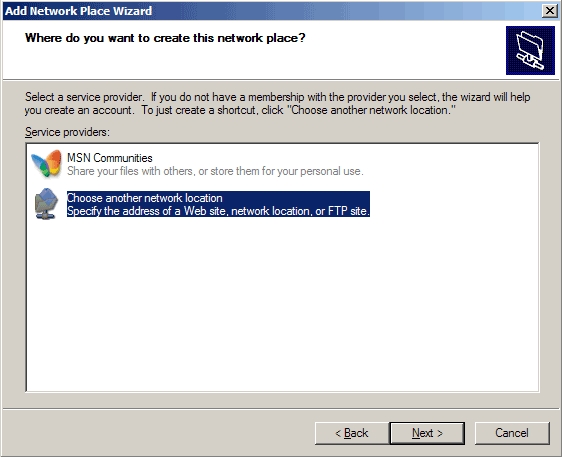
4. Select "Choose another network location" and click "Next"
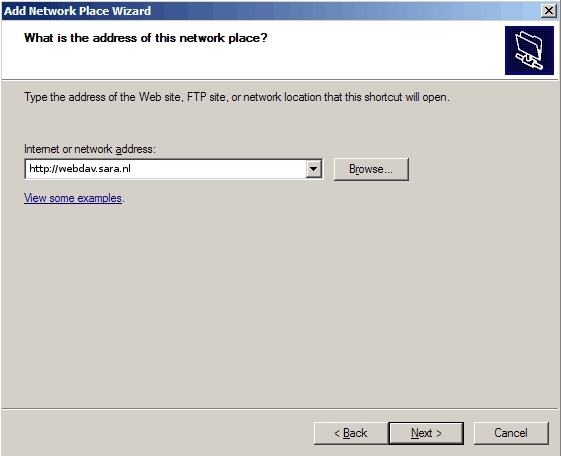
5. Enter the http://webdav.sara.nl (HTTP) or https://webdav.sara.nl (HTTPS) and then click "Next":
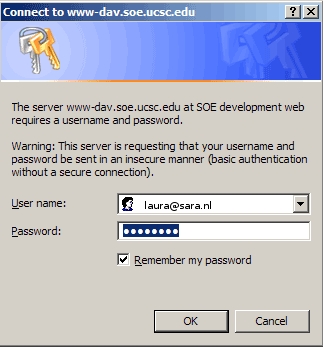
6. Enter your BeeHub user name and password and click "OK":
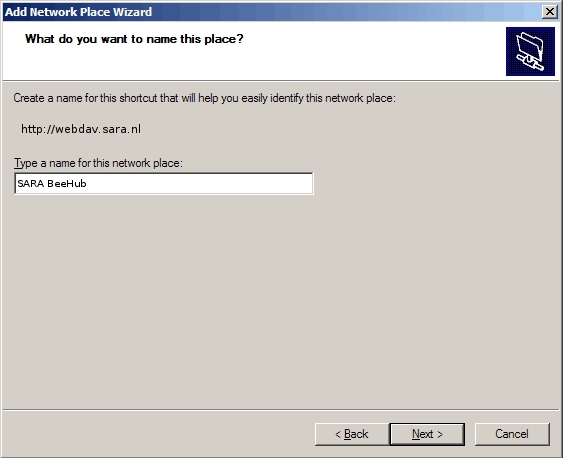
7. Enter a name for your BeeHub connection. The default is probably fine, but you can call the connection anything you like:
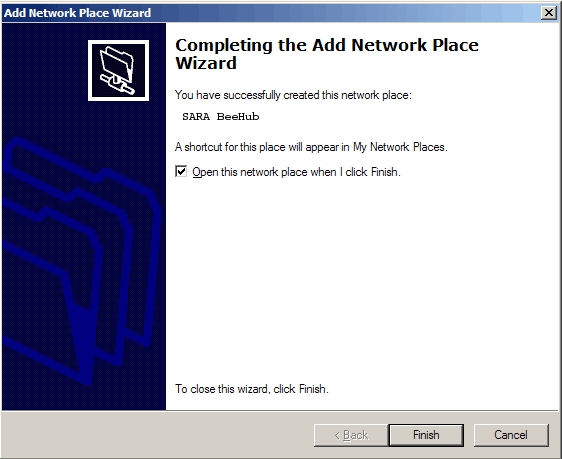
8. Click "Finish":
You now have created a BeeHup connection.
Click "Start", and then "My Network Places" to connect the next time.
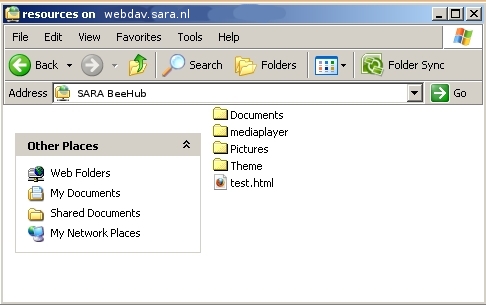
Double click your BeeHub connection:
Now you can browse your files:
OS-X
OS-X build-in client
Linux
Nautilus (Gnome file browser)
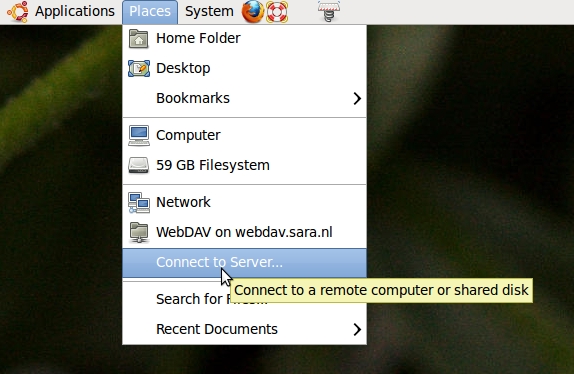
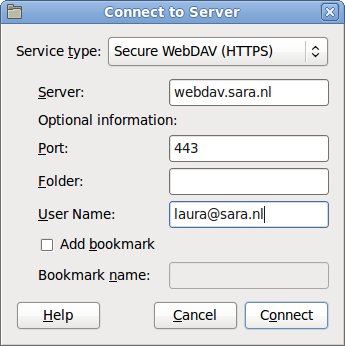
At the topbar choose Places->Connect to server...:
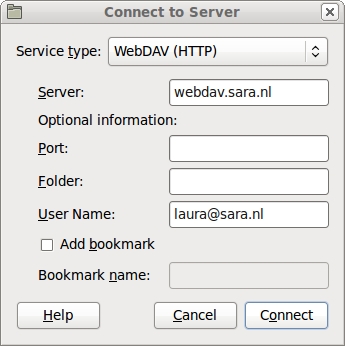
Connect with http or https. User name should be <beehup_username>@<domain>.nl:
With https the port number is 443:
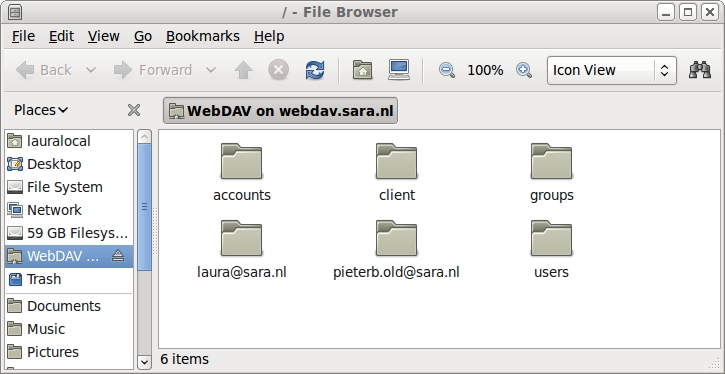
Now you can browse to your files:
