Difference between revisions of "InstallRlgiOnWindows"
Jump to navigation
Jump to search
| Line 4: | Line 4: | ||
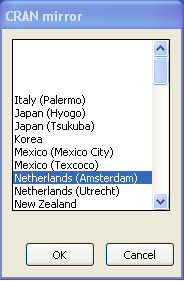
* Start Rwin, then set the correct CRAN mirror: | * Start Rwin, then set the correct CRAN mirror: | ||
[[File:Rmirror.png]] | [[File:Rmirror.png]] | ||
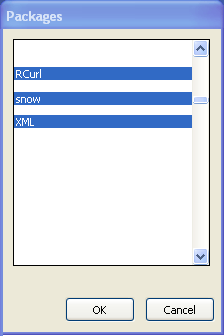
| − | * Next, install the packages <tt>Rcurl</tt>, <tt>snow</tt> and <tt>XML</tt>: | + | * Next, install the packages <tt>Rcurl</tt>, <tt>snow</tt> and <tt>XML</tt> (The screenshot was modified for clarity; you can select multiple packages for installation using Ctrl+Click): |
[[File:Rinstallpkg.png]] | [[File:Rinstallpkg.png]] | ||
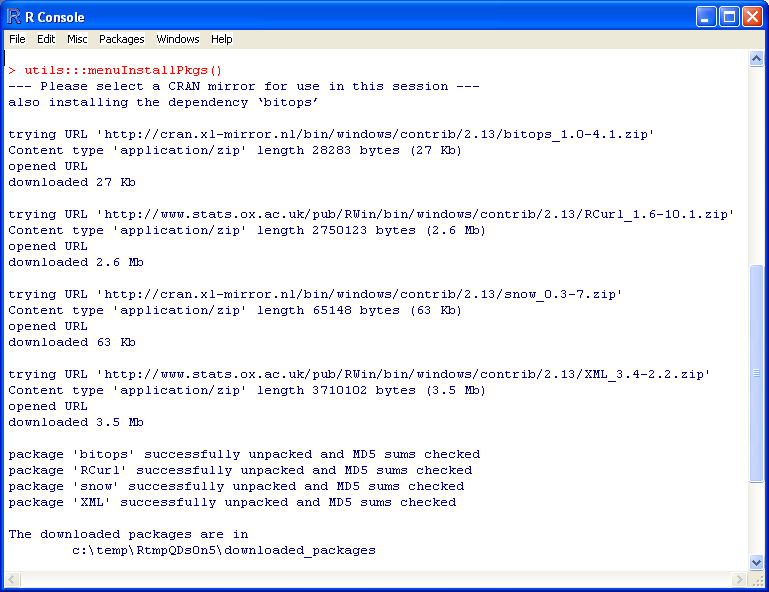
* If the packages are installed correctly the R console window will show the following output. Note that the depending <tt>bitops</tt> package was automatically installed as well: | * If the packages are installed correctly the R console window will show the following output. Note that the depending <tt>bitops</tt> package was automatically installed as well: | ||
Revision as of 15:06, 14 September 2011
The installation of the Rlgi package for the Windows version of R is slightly different from the Linux installation. This mini tutorial explains how to install the Rlgi package using the Rwin 2.13 GUI
- Download the File:Rlgi 0.0.7.zip package for Windows
- Start Rwin, then set the correct CRAN mirror:
- Next, install the packages Rcurl, snow and XML (The screenshot was modified for clarity; you can select multiple packages for installation using Ctrl+Click):
- If the packages are installed correctly the R console window will show the following output. Note that the depending bitops package was automatically installed as well:
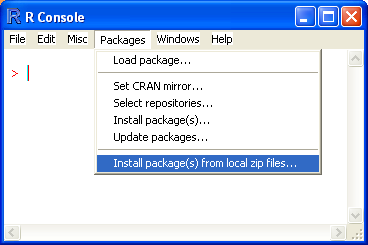
- Now select 'Install local ZIP' file from the Packages menu:
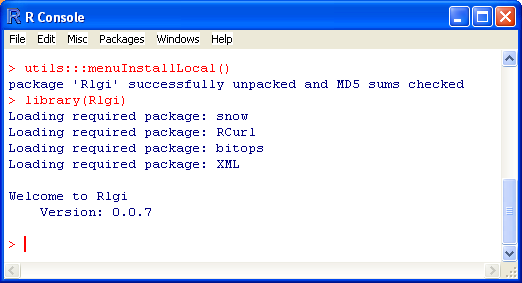
- After all packages have been installed the R console will show:
You are now ready to continue with the Example session
